by Lauren Kitchen
Stripping woodwork was the last thing on my mind when we purchased the E. Cort Williams home in the Uplands Historic District in May of 2019. There were many other thoughts flowing through my head – the need for a kitchen worthy of the manor’s inherent beauty, updating the baths and converting the third story into livable space – not to mention the possible structural issues that come along with owning a 135-year old home.
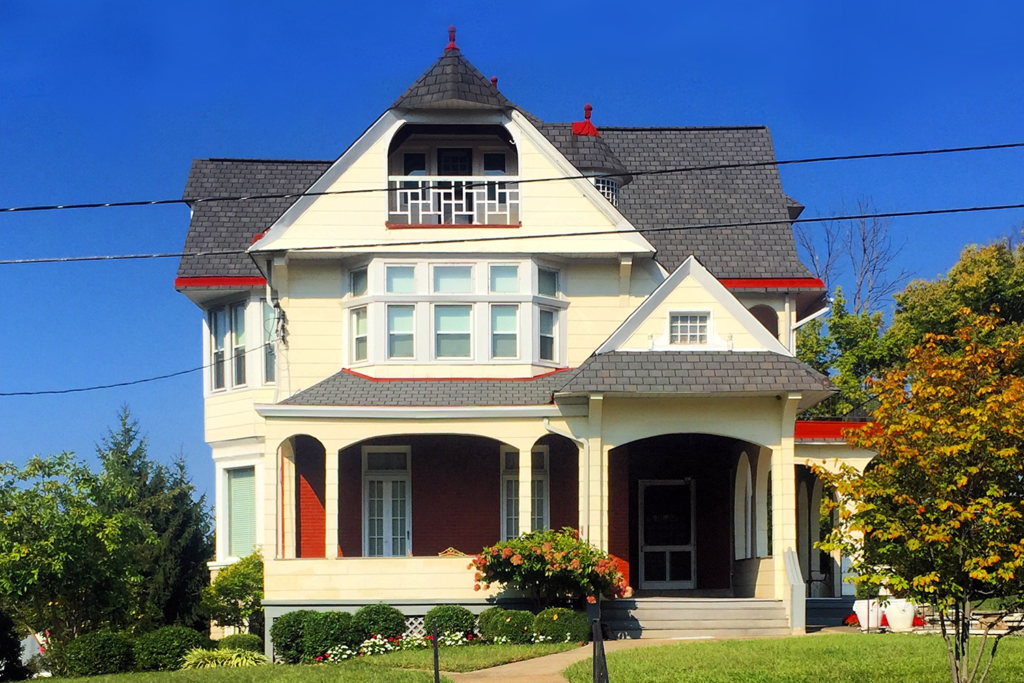
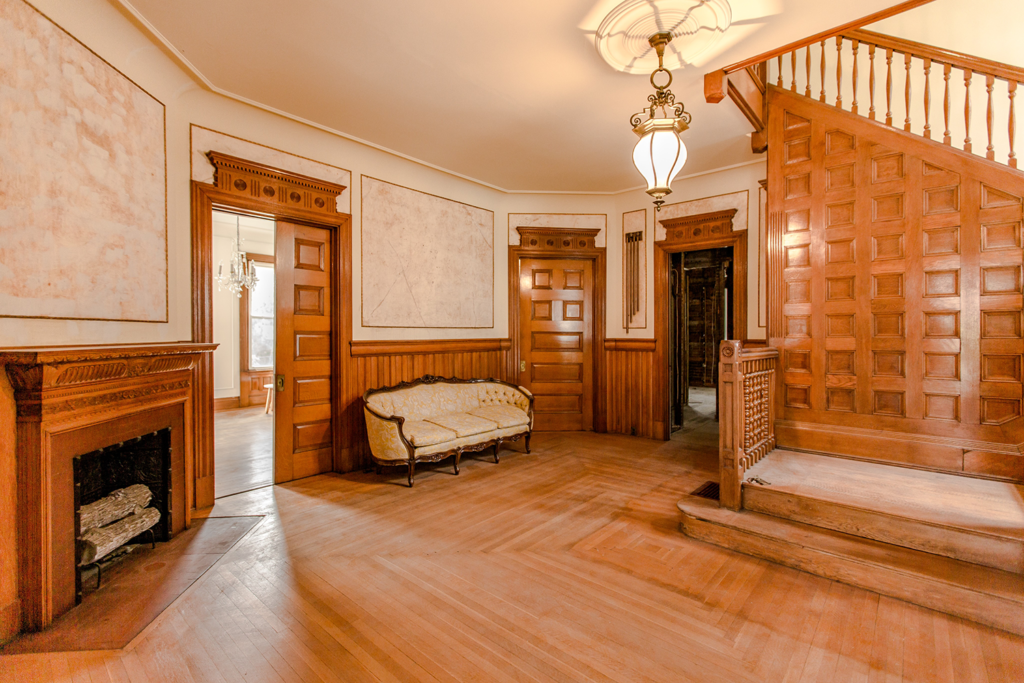
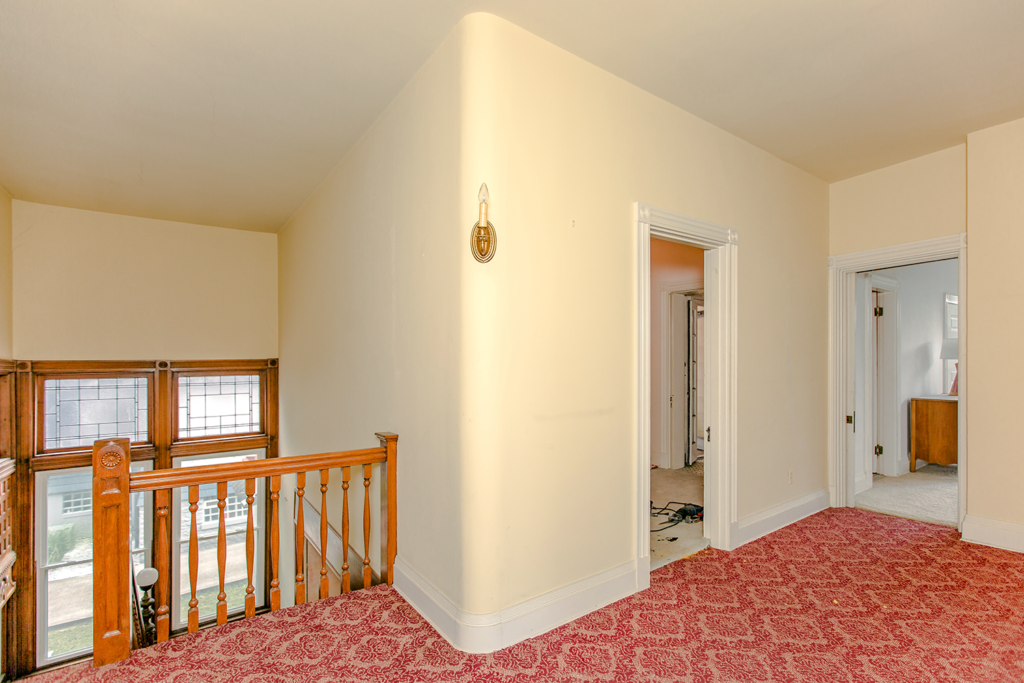
Being an 1885 Eastlake Victorian, the trim, baseboards, pocket doors and hand-carved fireplaces throughout the first floor (made of walnut, oak and cherry) are breathtaking – original, untouched and natural. The second and third stories contain a lot of those same details, but everything is scaled back and painted.
Our previous home, a 1918 craftsman style bungalow, is quite similar. The first floor’s woodwork is natural while the second story is painted. This was familiar to me; it simply seemed natural. The thought had never crossed my mind until my uncle, an interior designer, suggested stripping the upper floors of the Eastlake ‘to create a better flow’ throughout the home.

My initial reaction was ‘absolutely not,’ fully understanding the magnitude of such as a task. As a young girl, my father taught me how to strip furniture. I recall the process having multiple steps, being time consuming and quite messy. There were many other more important tasks at the new home that needed my attention.

Days went by, and I continued tackling small projects around the Eastlake while the professionals worked on those items that topped the home’s list of needs. My uncle’s suggestion, though, kept replaying in my mind, like a devil on my shoulder, whispering in my ear. I fell in love with the Eastlake because of its natural beauty, and that included the woodwork. I know how to strip wood, so why was I disregarding the idea of revealing that beauty throughout? I should do this, if not only for me, but for the manor and its future owners.
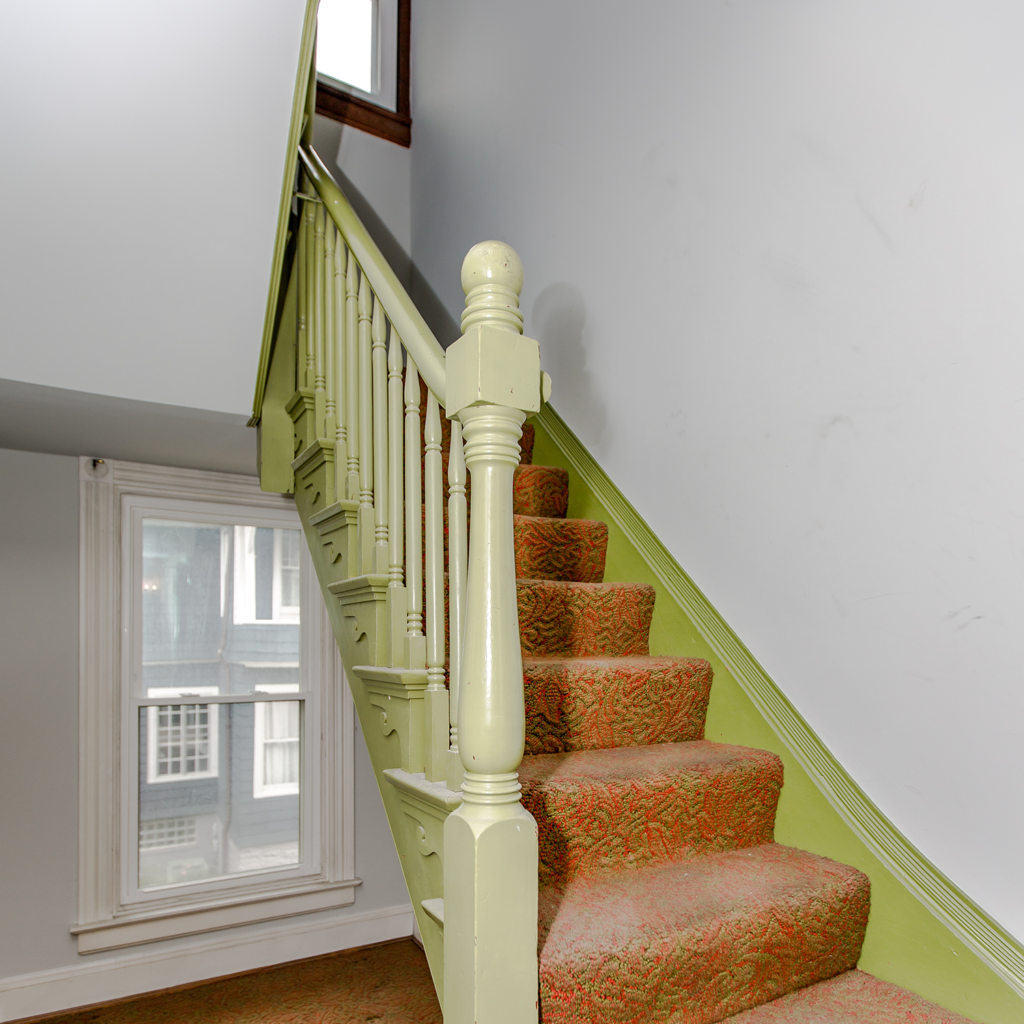
So there it was. I made the decision to strip the woodwork on the second and third story hallways, including the rear stairway, creating that suggested natural flow.

Things I learned throughout the process:
Stripping millwork is much more difficult than stripping furniture
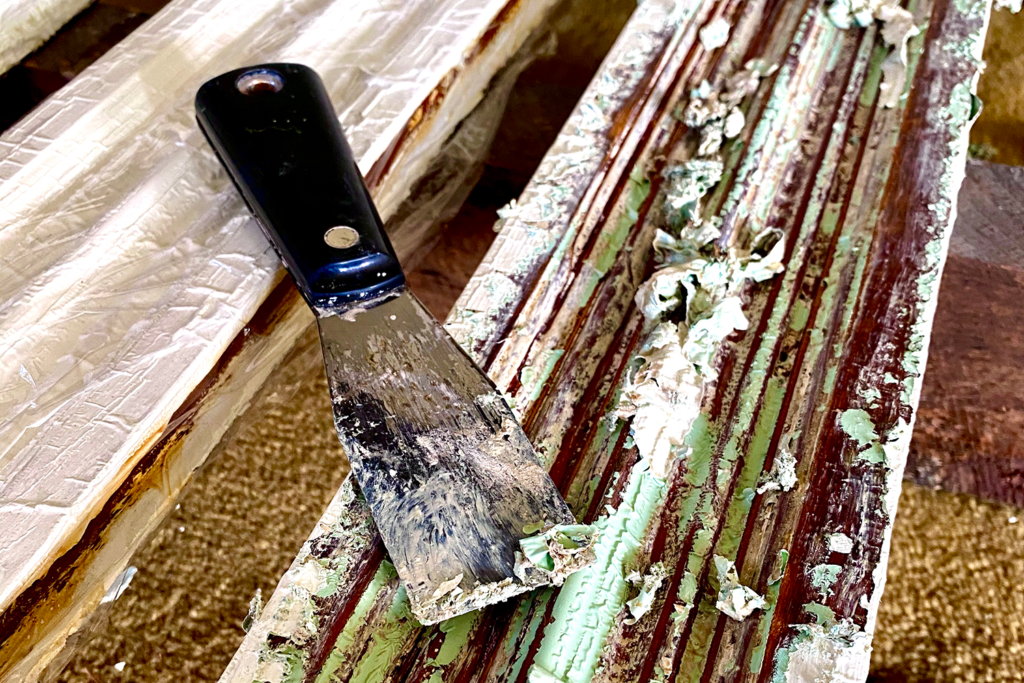
As a young girl, I simply took my piece of furniture outside to our gravel driveway, along with the stripping product, putty knife and steel wool. Once the old varnish was lifted, it was quite easy to clean the piece down to the bare wood with dish detergent and a hose. With the vast majority of the millwork in need of stripping still attached to the original plaster walls, hosing down the woodwork is not an option. Luckily, one of our contractors suggested a product, Blue Bear stripping gel. It is thick and safe for indoor use, making it an ideal product for vertical trim. Compared to other products on the market, it is a bit pricier, but the benefits outweighed the cost for me, and it performs like a champ.

Pine is super soft
Unlike the first floor, I discovered the second story was mostly trimmed with pine. This is not unusual for an older home. Often, pine was used on upper levels and would be painted. I quickly realized that trying to remove the last bits of paint with steel wool was not an option on pine. The wood, once the stripper gel penetrated, became too soft and steel wool was too abrasive. It roughed up the mill work making it look like a fine mulch. This is not what the Eastlake deserved – me destroying trim that had been in place since the home was built. I needed to apply the stripper, let it sit, scrape the vast majority of finish off with a putty knife, and then allow the wood to dry out thoroughly before removing the rest of the paint with sandpaper.
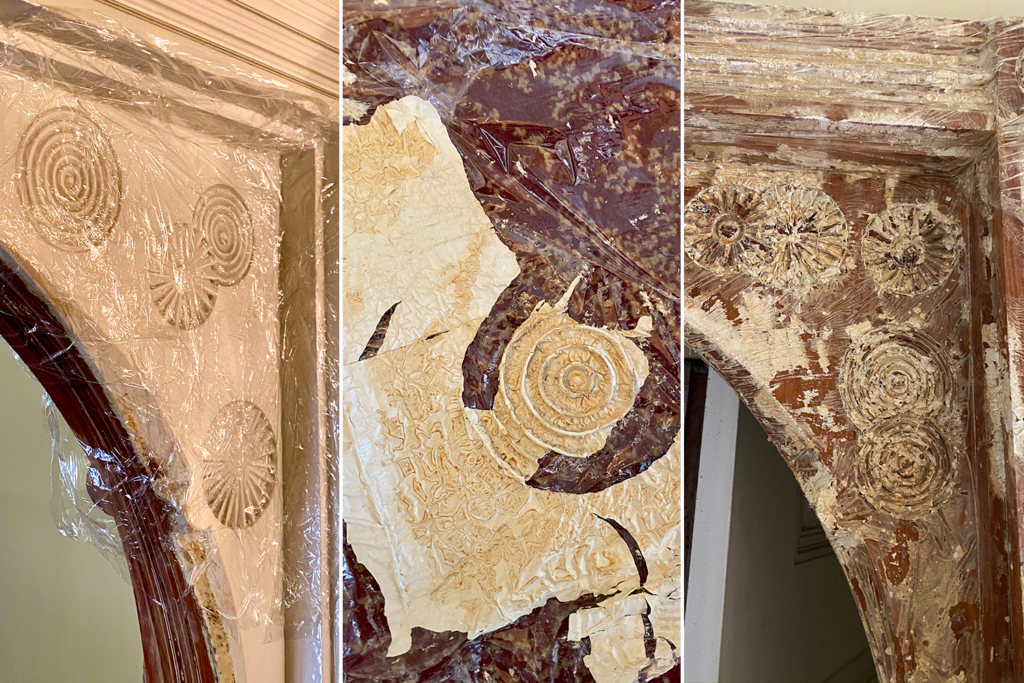
Plastic wrap is a girl’s best friend
You will often hear ‘let the stripper do the work.’ Patience is not my strong suit, but it is critical when it comes to stripping woodwork. Being a busy mom of three, timing is everything. Applying the stripper gel and tightly wrapping the woodwork with plastic wrap was a game changer. I could apply and wrap one day, allow the product to work its magic overnight, and return the next day to remove the loosened finishes. Plastic wrap prevents the stripper from drying out and truly gives the product time to penetrate multiple layers of finish, saving you time and elbow grease.

Dental tools can be used for more than cleaning teeth
The Eastlake is full of hand-carved details which is a blessing and a curse. They are beautiful but can also be quite difficult when it comes to removing multiple layers of finish. I quickly learned that simple stripper gel and a putty knife were not going to get the job done. Instead, I purchased a set of dental tools and started to pick at the tiny cracks. I was surprised at how well they worked removing the paint. Ultimately, when I finished one section of detailing, I wondered if I’d missed my calling as a dental hygienist?
The Cobra is a fascinating tool but comes with a steep learning curve
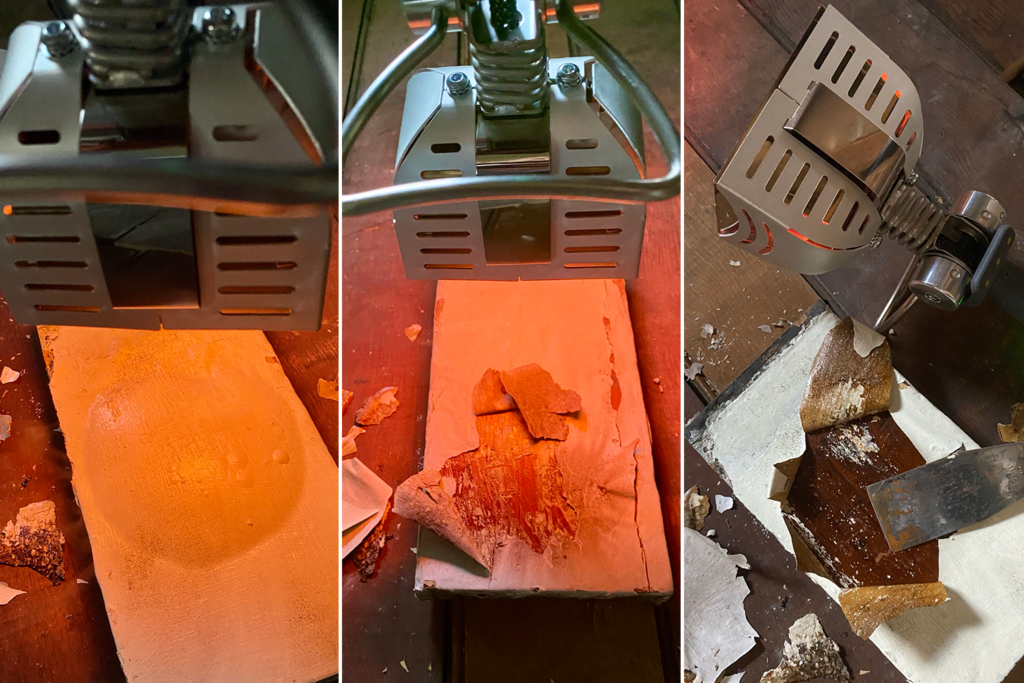
A fellow preservationist asked if I had ever used a Cobra. Honestly, I had no idea what he was talking about and therefore quickly researched the product. It’s a Swedish-made tool that uses highly concentrated infrared light to loosen paint and varnish. I saw the price tag and initially thought it was not for me but, once again, that devil appeared on my shoulder. I knew I wanted to have all the doors on both the second and third stories stripped and refinished back to natural wood. I planned to have them dipped but, if this tool worked, not only would it save me quite a bit of money, but it would save the joinery of the 135-year old doors that can sometimes be weakened by dipping.
When the Cobra arrived, it was like Christmas morning. I could not wait to take it for a test run. The instructions are specific and should be read carefully. I thought I was a pretty good reader but must have missed the part about allowing it to sit too long in one spot, because I charred the very first piece I tested. I practiced more and eventually I discovered this tool’s magic. As described, the infrared light lifts the paint from the wood. The paint blisters up right before your eyes with no gooey mess like a stripper gel. It can then easily be scraped with a putty knife or carbide tool, leaving behind hard flakes of paint.
Embrace the victories, whether large or small, and tackle the project in steps
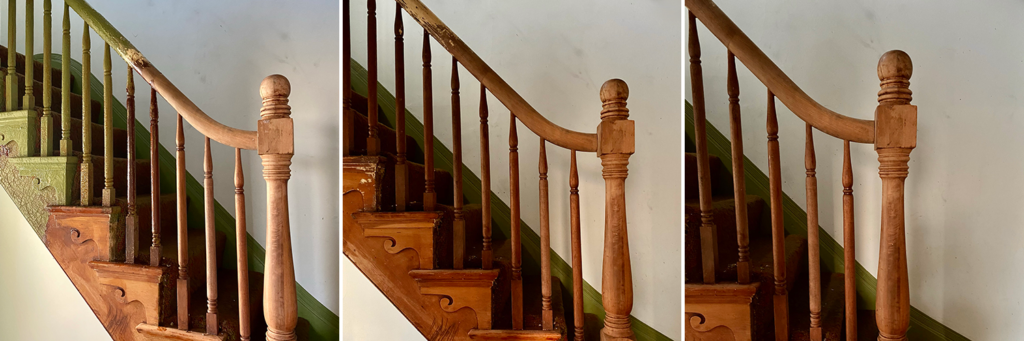
Stripping woodwork is a marathon, not a sprint. Therefore, it’s best to tackle small sections at a time. I started stripping woodwork in September 2020, during quarantine, and am far from being finished. Many days, I question why I ever started this project. It is difficult, time consuming and messy. It would have been much simpler to throw a fresh coat of paint over the existing woodwork and move on. But then, I clean out a set of hand carved details, step back and imagine how beautiful it will be once it is stained and finished. My most satisfying experience to date has been discovering that the rear staircase is made of cherry and not pine, as I’d assumed. It is absolutely gorgeous, and I cannot wait to expose its natural beauty.
If you are considering stripping woodwork, understand that it will take time, but you will develop new skills, learn new tricks as you go and, in the end, you’ll be happy that you revealed your home’s natural beauty.
Lauren Kitchen is the proud owner of this special house with her husband, and calls the home her “last renovation project.” You can see more photos of the work-in-progress on Instagram.